How To Make Rolled Ice Cream
We introduce a simple, stepwise recipe that brings a street-food favorite into our home kitchen. Rolled ice cream is a stir-fried style dessert made by spreading a chilled base on a frozen metal tray and scraping thin sheets into neat rolls.
We outline two easy bases: a quick 1 cup heavy cream plus 1/2 cup sweetened condensed milk mix, and a classic custard of milk, cream, sugar, vanilla, and a pinch of salt. Both spread thin, freeze flat, then yield 4–6 tight rolls with an offset spatula.
We explain setup and safety: chill a baking sheet, stabilize it on a towel, and work fast as the surface warms. Expect simple gear you already own, flavor ideas like Nutella or strawberry cheesecake, and tips for steady, camera-ready presentation.
Follow our guide and you will serve rich, photogenic rolls that taste like they came from a specialty shop. We provide troubleshooting and timing tricks later so your first batch succeeds.
Why rolled ice cream is worth making at home right now
Brought from Thailand, rolled ice cream gives us a dense, creamy bite that differs from churned soft serve. We work the base directly on a frozen tray, so no extra air gets folded in.
What sets stir-fried ice cream apart
Stir-fried ice cream freezes fast on a cold plate, which yields a firmer texture and intense taste in each spoonful. We can fold crushed cookies, chopped chocolate, or diced strawberries into the mix on-tray for instant custom flavor.
Flavor creativity and visual appeal
The rolling step creates neat spirals placed upright in a cup, so each serving is as photo-ready as it is tasty. Quick batches make this a great weeknight treat or party moment.
| Attribute | Stir-fried | Soft Serve | Gelato |
|---|---|---|---|
| Texture | Dense, compact | Airy, soft | Velvety, dense |
| On-tray mixing | Yes — instant mix-ins | Limited | Added later |
| Presentation | Rolled spirals in a cup | Swirled cone | Scooped or plated |
We can swap bases and toppings to fit diets and seasons, and our recipe guidance makes the learning curve short. The result is shareable, customizable, and reliably delicious.
Essential tools, surfaces, and freezer setup for clean rolls
We rely on a compact setup that keeps the base cold and gives us clean, even spirals every serving.

Flat metal baking tray: size and material
Use a rimmed metal baking sheet that fits fully inside your freezer. A large tray lets the base spread into a uniform layer so the final rolls are consistent.
Choose stainless steel or thick aluminum. These metals chill fast and keep the surface cold, which helps the ice hold structure while we work.
Offset or flat scrapers: the right edge
We use a thin, firm offset spatula or flat scraper with a straight, sharp edge. That tool slides under the sheet at a steady angle and forms neat spirals without gouging.
Pre-freezing and stabilizing the station
- Pre-freeze the sheet, spatula, and a mixing bowl for about 30 minutes so the base firms on contact.
- Clear freezer space so the tray sits flat; this prevents pooling that makes weak spots in the layer.
- Place the frozen tray on a folded tea towel while scraping. The towel stabilizes the tray and protects the counter during firm pushes.
- Keep a second cold spatula ready and have ingredients staged and chilled to avoid added warmth at roll time.
| Material | Chill Speed | Best Use |
|---|---|---|
| Stainless steel | Fast | Small batches, consistent chill |
| Thick aluminum | Very fast | Larger sheets, quick freezing |
| Thin aluminum | Moderate | Light use, watch for warping |
Allow a few minutes of bench time after removing the tray so the surface relaxes slightly. That step reduces cracking while keeping the ice cold enough for quick rolling.
Selecting your ice cream base: condensed milk vs classic cream-and-milk
Choosing the right base decides the dessert’s sweetness, texture, and prep time.
We offer two clear paths. The fast, two-ingredient cream base mixes 1 cup heavy cream with 1/2 cup sweetened condensed milk and spreads straight onto the chilled tray. It needs no cooking and sets quickly for immediate scraping.
Two-ingredient option
This condensed milk blend gives a dense, very sweet result with elastic rolls. It is ideal for first-time batches and fast service.
Classic cooked base
For more control, heat heavy cream, whole milk, sugar, vanilla, and a pinch of salt until small bubbles appear. Cool to room temperature, then refrigerate for one hour before using.
- Sweetness: condensed milk brings built-in sugar; the classic lets us dial sugar precisely.
- Texture: condensed yields tighter spirals; the classic offers a cleaner, lighter bite.
- Chill discipline: always cool a hot base to room temp before chilling to avoid thinning from condensation.
| Feature | Condensed Base | Classic Base |
|---|---|---|
| Prep time | Fast, no cook | Requires heating + 1 hr chill |
| Sweetness | High, built-in | Adjustable |
| Best for | Quick practice batches | Fine-tuned flavors |
Both bases suit stir-fried ice cream; we suggest starting simple, then logging tweaks like vanilla level or milk ratio for repeatable favorites.
How To Make Rolled Ice Cream step by step
We walk through a tight, practical sequence that turns a chilled base into neat spirals on a frozen metal sheet. Start with 1 cup heavy cream mixed with 1/2 cup sweetened condensed milk poured onto a cold sheet.
We mix the base briefly right on the metal with an offset spatula so the ice cream base spreads without warming in another bowl. Next, spread a very thin layer edge-to-edge so freezing happens fast and evenly.
- Freeze flat for 4–5 hours or overnight so the thin layer sets uniformly.
- Place the tray on a tea towel while scraping; this stabilizes the sheet and protects the counter.
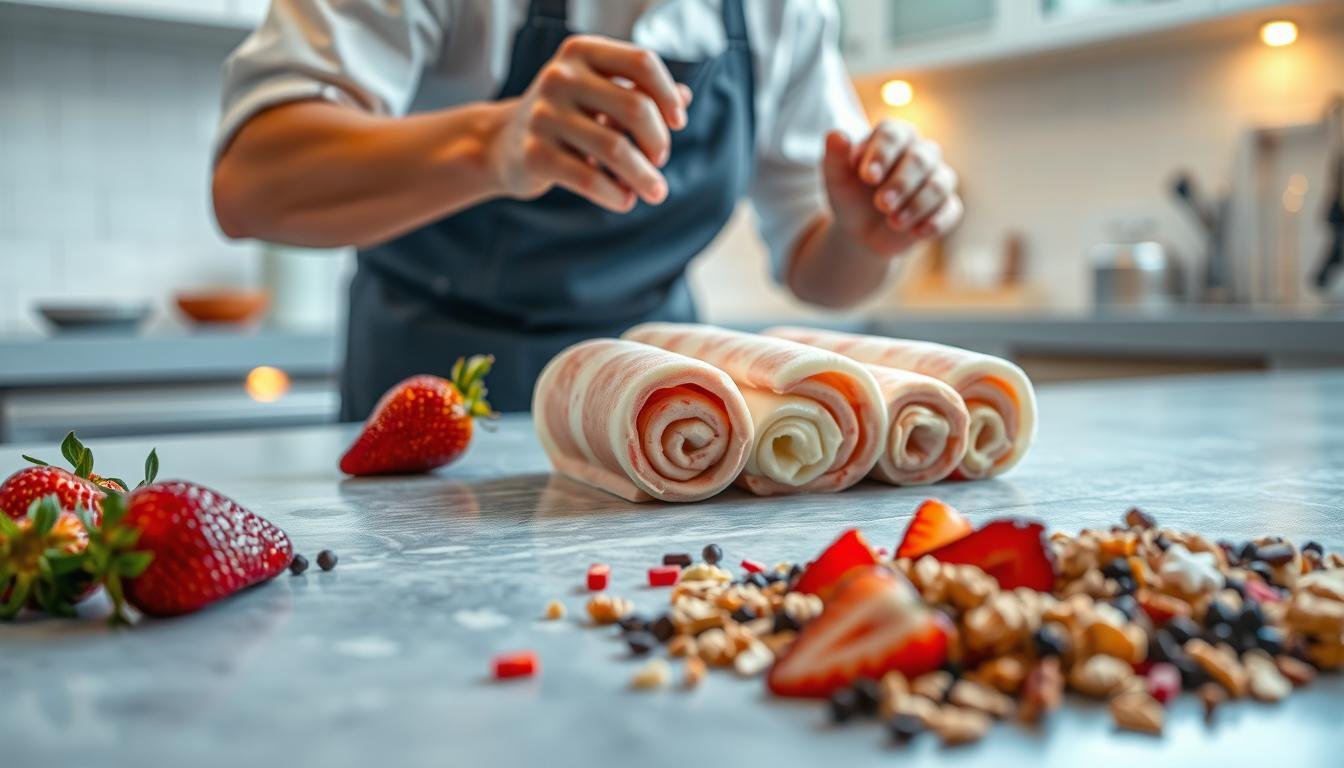
- Scrape at roughly a 45-degree angle with a sharp spatula, pushing steadily to lift tight spirals.
Work in quick, deliberate passes. Limit the minutes the tray sits at room temperature so the rolls keep shape. Form 4–6 cream rolls per serving and use tongs to place them gently into cups.
| Step | Benefit | Note |
|---|---|---|
| Mix on cold sheet | Even distribution | Avoid warming in bowls |
| Thin layer spread | Fast freeze, uniform texture | Edge-to-edge coverage |
| Scrape at 45° | Tight, clean spirals | Use offset spatula and steady push |
Flavor ideas and mix-ins that roll beautifully
We pick mix-ins that freeze fast and push cleanly across the tray for the best textures and visuals.
Our Nutella variation folds a spoonful into the base before spreading. The hazelnut-chocolate profile stays smooth in cream rolls and pairs nicely with roasted nuts or a Ferrero Rocher on top.
Strawberry cheesecake
We cut diced strawberries and fold them with crushed graham crackers and small bits of cream cheese into the mixture. Top each serving with a fresh strawberry and graham shards for contrast in taste and texture.
Cookies and cream
We crush oreo cookies into fine crumbs and blend them into the base so the crumbs distribute evenly. Serve with a whole cookie for presentation and an extra crunch.
- Keep mix-ins modest so the sheet stays even; large chunks can snag the spatula and tear the layer.
- Chill nuts, fruit, and cheeses briefly so they do not warm the base and create soft spots.
- Coordinate toppings with the base—fresh strawberries, a chocolate drizzle, or cookie halves—for color and texture that match what’s inside.
- Try twists like toasted coconut with dark chocolate, peanut butter swirl with banana, or matcha with white chocolate chips.
| Variation | Key add-ins | Best topping |
|---|---|---|
| Nutella | Nutella, chopped hazelnuts | Ferrero Rocher or roasted nuts |
| Strawberry cheesecake | Diced strawberries, graham crumbs, cream cheese bits | Fresh strawberry and graham shards |
| Cookies & cream | Crushed oreo cookies (fine) | Whole cookie and light cocoa dusting |
Rolling technique mastery and quick fixes
A neat set of spirals depends on how we read the tray and respond in the first few seconds. Small changes in angle, pressure, and timing fix most problems and help us produce consistent results every batch.

If the layer cracks or won’t roll
Allow the sheet to sit on the counter for 1-2 minutes. Then slide the spatula under with a shallower angle and start the first curl gently. Trimming ragged edges before the lift can prevent snags.
If the base is too hard to scrape
Wait a few minutes so the surface softens, or warm the spatula slightly with your hands. Apply steady, confident pressure instead of chopping; steady pushes make clean spirals without tearing the layer.
If the mixture melts too fast on the tray
Shorten bench time, chill tools between pulls, and return the tray to the freezer briefly between batches. Stabilize the tray on a towel so it does not slide while we work.
Consistent strip width for neat spirals
- Keep strips about 1–2 inches wide for upright, uniform rolls.
- Maintain a clean spatula edge; residue can snag the sheet.
- Practice on a small section first and adjust minutes of rest as needed.
| Issue | Quick Fix | Why it works |
|---|---|---|
| Cracking | Warm 1–2 minutes; shallower angle | Relaxed sheet curls rather than breaks |
| Too hard | Let rest; warm spatula slightly | Softens without melting center |
| Melting fast | Chill tools; quick passes; rechill tray in freezer | Keeps surface firm while we form rolls |
With these moves and a thin spatula at about a 45-degree push, we can make rolled ice twice as consistent. Small practice runs sharpen our feel and soon every serving looks professional.
Serving like a pro: cups, toppings, and presentation
A strong finish turns simple rolls into a striking, bakery-style dessert ready for guests. We arrange 4–6 rolls in a sturdy cup so each spiral stands upright and stays visible.
Whipped cream, strawberries, and chocolate sauces
Top each cup with a dollop of whipped cream and matching accents. For berry bases we add fresh strawberries. For cocoa-forward cups we drizzle warm chocolate and sprinkle shavings.
Plating multiple rolls for a bakery-style treat
- We choose sturdy cups that hold 4–6 rolls and leave room for toppings.
- Place rolls with tongs and use a spatula only to nudge edges so curls do not flatten.
- Add texture: cookie halves, wafer sticks, or toasted nuts for contrast.
- Stagger roll heights and use color contrast—bright berries, dark chocolate, pale whipped cream—for visual impact.
- Serve immediately and keep extra cups chilled so each serving holds its shape.
| Element | Recommended | Why it matters |
|---|---|---|
| Cup size | Sturdy 12–16 oz | Holds 4–6 rolls upright and leaves room for toppings |
| Placement tool | Tongs; spatula for nudging | Protects spiral shape during transfer |
| Toppings | Whipped cream, strawberries, chocolate | Color, flavor match, and texture contrast |
Time and temperature: getting the texture just right
Timing and temperature are the twin controls that turn a loose mixture into firm, ribbon-like spirals.
We map each stage so we can repeat results. For a heat-based classic base, cool to room temperature first, then chill in the refrigerator for about one hour.

Minutes vs hours: how long each stage takes
Spread the cream base as a thin layer on a pre-frozen sheet and freeze flat for 4–5 hours or overnight for best firmness.
Work quickly at the bench; allow single-digit minutes rest if the surface is too hard before scraping. Track minutes and ambient kitchen temperature on the first run so we can replicate success.
Freezer behavior and ideal thin layer thickness
Freezers vary. Rear zones and wire shelves often chill faster while door areas warm when opened. Rotate the tray halfway through a long freeze if your appliance has hot spots.
- A true thin layer freezes through fast and avoids soft pockets that tear under the spatula.
- Thicker pours add hours and make rolling difficult; thinner spreads roll cleaner and faster.
- Keep the ice cream base and mixture very cold before spreading so it does not melt on contact.
- Pre-chill serving cups and spoons and keep a backup chilled sheet for multiple rounds.
| Stage | Approximate time | Why it matters |
|---|---|---|
| Cool classic base | Room temp then 1 hour chill | Prevents condensation and thinned mixture |
| Freeze on sheet | 4–5 hours or overnight | Ensures firm ice for clean lifts |
| Bench rest | Single-digit minutes | Softens edge for first curl without slush |
Rolled ice cream vs soft serve vs gelato
Each style—tray-rolled, soft-serve, and gelato—offers a different mouthfeel and service ritual. We compare texture, serving method, and ingredient focus so you can choose the right dessert for your event.
Tray-rolled: dense texture and on-tray mixing
We define rolled ice cream as a low-aeration, on-tray style. Add-ins are chopped and mixed directly into the base on a frozen metal surface and then spread thin and rolled. That method yields a dense bite and highlights crunchy ingredients like cookie crumbs or nuts.
Soft serve: aeration and classic cones
Soft serve gains lightness from incorporated air in the machine. The texture is fluffy and melts quickly. It is usually dispensed into cones or a cup from a nozzle and relies on smooth, airy mouthfeel rather than dense mix-ins.
Gelato: slower churn, warmer serve, richer flavor
Gelato is churned more slowly and served slightly warmer than other frozen desserts. That warmer serve and lower aeration concentrate flavor and make the texture silky. It emphasizes dairy richness, using a higher milk-to-cream ratio than our other formats.
- Ingredient emphasis: tray-rolled showcases crunchy mix-ins; soft serve highlights airy smoothness; gelato spotlights dairy depth.
- Service: tray-rolled assembled on a flat surface; soft serve extruded into cups or cones; gelato scooped from pans.
- Mouthfeel: tray-rolled gives dense bites; soft serve is fluffy and quick-melting; gelato offers a creamy, lingering flavor.
| Style | Texture | Typical service | Best pairing |
|---|---|---|---|
| Tray-rolled | Dense, compact | Cup, assembled to order | Chocolate with crunchy add-ins |
| Soft serve | Light, aerated | Cone or cup | Classic vanilla swirl |
| Gelato | Silky, concentrated | Scooped from pans | Pistachio or pure fruit |
We recommend choosing the style that matches the experience you want: interactive dessert theater with tray-rolled, nostalgic ease with soft serve, or nuanced dairy depth with gelato. Adjust milk and cream ratios and serving temperature to dial in the final texture and flavor.
Bring your first batch to life and share the sweet results
Let’s turn a chilled sheet, a sharp spatula, and a few pantry staples into a shareable home dessert that looks and tastes special.
For a fast start, combine 1 cup heavy cream with 1/2 cup condensed milk on a pre-chilled metal sheet, spread thin, and freeze at least five hours. Stir in crushed Oreo cookies, diced strawberries with graham and cream cheese, or a spoonful of Nutella before freezing for clear flavor direction.
Prepare two half-sheets so one stays frozen while we practice curls on the other. Place the tray on a towel, scrape at roughly 45 degrees, and work quickly; aim for 4–6 upright ice cream rolls per cup and finish with matching toppings and a vanilla flourish.
Log milk, vanilla, and ingredient amounts in a bowl-side notebook, try a chocolate and a fruit flavor on a weekend, and rely on a steady sheet, a clean spatula, and strict freezer timing. Share the results at home, note tweaks, and enjoy refining your recipe and presentation.