How to Make Mochi Ice Cream
We promise a clear, step-by-step recipe that yields a pillowy shell and a frozen center without fancy gear. The method is approachable: scoop portions, freeze them, cook a sweet rice flour dough in short bursts, then wrap each chilled ball and refreeze.
We’ll explain timing, tools, and small tricks we use. We dust with starch, work one piece at a time with cold tools, and adjust microwave time for wattage. This post is built for home cooks in the United States who want consistent results and flavor flexibility, from vanilla and matcha to dairy-free or sorbet options.
Why We Love Mochi Ice Cream at Home
We love turning simple pantry staples into a handheld dessert that wows guests and kids alike.
Making mochi at home gives us control over flavor, sweetness, and portion size. We can use classic vanilla ice cream or swap in sorbet and dairy-free options so everyone can enjoy a tailored treat.
Prep is straightforward: freeze small scoops, keep tools cold, and dust generously with starch. Working one piece at a time cuts stickiness and keeps the dough smooth and round.
- Better flavor control and portioning than store boxes.
- Cost savings and easy batch scaling for parties.
- Family-friendly steps that teach handling sticky dough and temperature care.
| Feature | Homemade | Trader Joe’s / Store |
|---|---|---|
| Flavor options | Any ice cream or sorbet | Limited, prepackaged |
| Cost per piece | Lower with batch prep | Higher retail price |
| Control over texture | Adjust dough thickness | Fixed factory texture |
| Skill gain | Learn temperature and dough handling | No skill needed |
What Mochi Ice Cream Is and How It Came to the US
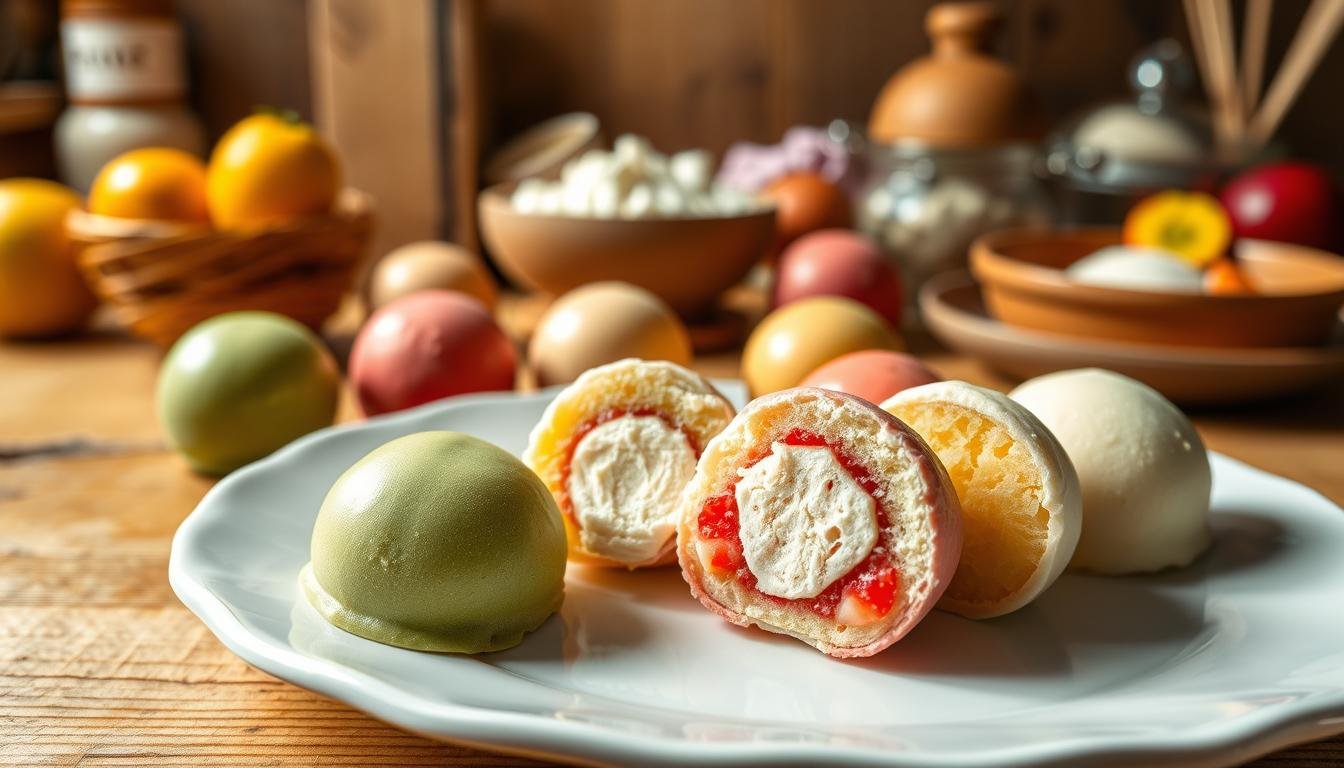
A tiny, hand-held treat pairs a pillowy rice shell with a cold, creamy center for a delightful bite.
Pillowy dough with a creamy ice center
We define mochi ice cream as a small round confection with a soft, slightly sweet shell made from glutinous rice and a frozen ice cream center. The contrast of chewy dough and chilled filling is the point of this dessert.
The exterior uses glutinous rice flour, not regular rice flour. When cooked correctly the dough turns almost translucent, which shows it is ready for wrapping.

From traditional rice cake to modern ice balls
Mochi began as a time-honored Japanese rice cake made from mochigome, prized for its elastic chew. In the early 1990s Frances Hashimoto at Mikawaya adapted that texture into the frozen, handheld version we enjoy.
- Debuted in Hawaii around 1994 and spread nationwide.
- Builds on treats like Yukimi Daifuku but with a frozen core.
- Now common at retailers across the US.
| Element | Traditional | Modern mochi ice |
|---|---|---|
| Shell | Dense rice cake | Thin, translucent dough |
| Center | None or sweet bean | Ice cream or sorbet |
| Main flour | Mochigome | Glutinous rice flour |
Ingredients and Sweet Rice Flour Guide
Choosing the correct rice-based flour and a few pantry staples sets us up for consistent, elastic dough.
Glutinous rice flour versus sweet rice flour explained
We use glutinous rice flour (often labeled sweet rice flour) for the wrapper. Regular rice flour will not give the stretch and chew we need.
Shiratamako versus mochiko: texture and availability
Shiratamako yields a springier, bouncier dough with very smooth handling. Mochiko is widely sold in US supermarkets and works well for home batches.
Sugar, water, and dusting starch
The basic dough mixes sweet rice flour, sugar, and water. Flour provides chew, sugar softens the texture, and water hydrates the starch so it gelatinizes when cooked.
Dust generously with cornstarch or potato starch while rolling. That prevents sticking without changing flavor.
Ice cream selection and sourcing tips
Pick dense, high-quality ice cream or firm sorbet for easy scooping and shape retention. Vanilla is a safe classic; matcha, mango, ube, and dairy-free options also work well.
- Measure flour by the cup consistently or use weights for repeatable hydration.
- Mochiko is common in grocery aisles; shiratamako is found at Japanese markets or online.
| Ingredient | Role | Notes |
|---|---|---|
| Sweet rice flour | Chew and structure | Use glutinous rice–based flour only |
| Sugar | Tenderness | Adjust for sweetness |
| Water | Hydration | Keep steady cup measurements |
| Cornstarch | Dusting | Use potato starch if preferred |
Tools, Trays, and Prep Setup
We arrange tools and chill a simple station so assembly moves quickly and cleanup stays easy.

Gather a small tray lined with parchment paper and a tub of starch for dusting. Keep a bowl of plastic wrap nearby for covering the dough and wrapping finished pieces.
Essential utensils and why they matter
Use an ice cream scoop for consistent centers. A medium to large microwave-safe bowl gives space for stirring sticky dough and absorbing heat safely.
We rely on a damp rubber spatula for stirring; a whisk clogs once the mixture thickens. A rolling pin flattens the sheet evenly so the wrapper stretches without tearing.
- Cookie cutters (3.5–3.75″) make uniform circles.
- Chill trays and tools to slow melting of the ice cream centers.
- Keep a generous bowl of cornstarch or potato starch at hand for dusting gloves and surfaces.
| Tool | Purpose | Quick tip |
|---|---|---|
| Ice cream scoop | Portion consistent centers | Use level scoops and freeze on a tray |
| Microwave-safe bowl | Cook dough in short intervals | Choose a bowl with room for stirring |
| Rolling pin | Even sheet thickness | Dust heavily with starch before rolling |
| Plastic wrap | Cover dough and wrap pieces | Use single sheets for each ball to avoid sticking |
How to Make Mochi Ice Cream Step by Step
This section walks through timed steps that yield elastic dough and firm frozen centers every batch. We keep steps short and repeatable so results stay consistent in a home kitchen.
Scoop and freeze the centers
Use a cookie scoop for about 12 portions (roughly 2 tablespoons each). Place the ice cream balls on a parchment-lined tray and freeze until solid, at least an hour or overnight.
Make the dough in a bowl
Whisk sweet rice flour, sugar, and water in a microwave-safe bowl until smooth. Cover loosely with plastic wrap.
- Microwave method: heat 1 minute, stir with a wet spatula, heat 1 minute, stir, then heat 30 seconds. The dough should be sticky and nearly translucent.
- Steaming option: steam about 15 minutes, stir once. Look for a translucent change as the dough thickens.
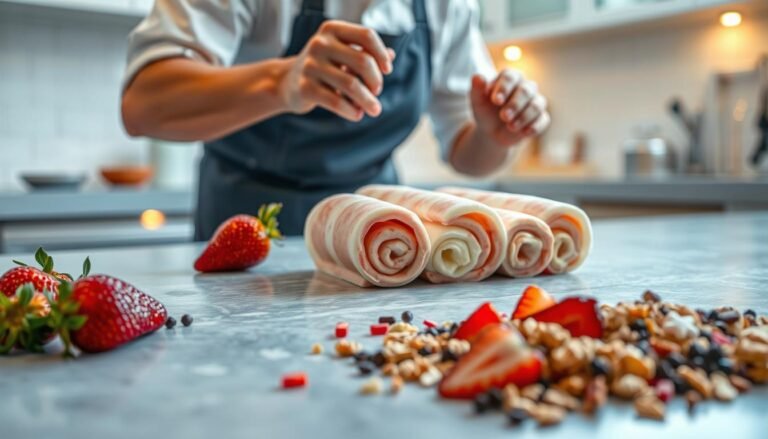
- Turn the dough onto a heavily dusted surface. Dust top and roll to about 1/4-inch thickness.
- Chill the sheet 15–30 minutes, then cut 3.5–3.75-inch circles. Work with one frozen scoop at a time. Place the scoop in the center, pull edges up, pinch or pleat to seal, and set seam-side down.
| Method | Time | Notes |
|---|---|---|
| Microwave | 1 min + 1 min + 30 sec | Stir between intervals; use a wet spatula |
| Steam | About 15 minutes | Wrap lid with towel to prevent drip; stir once |
| Assembly | 15–30 minutes chilling | Roll 1/4-inch, cut 3.5–3.75-inch circles, work quickly |
Shaping, Sealing, and Wrapping the Ice Cream Balls
A careful finish makes the wrapper neat and keeps each frozen center perfectly round.

Place a frozen scoop flat side down in the center of each cut circle. Lift the dough evenly around the scoop, keeping the sheet thick where it meets the top so it will not tear.
Brush away excess cornstarch before sealing. If an edge feels tacky, dust lightly and press. We pinch firmly, smooth the seam, then fold the excess under the ball for a tidy finish.
Securing shape with plastic and liners
Wrap each piece in a small square of plastic wrap and twist gently. This slight compression rounds the form and helps the seam hold.
- Work one ice cream ball at a time so the core stays firm.
- Wear thin gloves for grip, less sticking, and colder hands.
- Set wrapped pieces seam-side down in cupcake liners or an egg carton so each keeps its shape while freezing.
| Step | Why it matters | Quick tip |
|---|---|---|
| Center scoop | Prevents thin spots | Flat side down for stability |
| Pinch seam | Stops leakage during refreeze | Add a touch of cornstarch if tacky |
| Wrap and rest | Keeps round shape | Use liners or cartons for uniform balls |
We repeat these moves quickly and keep our dusted station tidy so stray starch does not interfere with adhesion. This final care yields consistent cream balls that look and slice like a pro-made treat. Follow this short process and your ice cream balls will hold shape and stay neat in the freezer.
Pro Tips for Perfect Mochi Dough and Timing
Small timing choices and chilled tools keep the dough manageable and the center firm. We focus on rhythm: chill tools, work one scoop at a time, and move steadily so the frozen core does not soften.
Work cold and fast: one ball at a time
Chill trays, cookie cutters, and our scoop ahead of assembly. We pull a single frozen scoop from the tray, wrap it, then return the wrapped piece to the freezer before grabbing the next.
Generous starch and sealing tips
Dust the bench, dough, and gloves with cornstarch or potato starch. Brush away excess starch at the seam so the edges will bond cleanly and hold shape.
Microwave timing and wattage notes
Adjust microwave intervals for your model; our times were tested near 1200W. Watch the dough for a sticky, nearly translucent change rather than following minutes rigidly.
Gloves, cutters, and flour choice
We use latex gloves to stop the dough from clinging and to insulate hands against cold. A cookie cutter makes uniform rounds and reduces thin spots.
Use sweet rice flour like shiratamako or mochiko, not regular rice flour. The right flour gives the stretch needed for neat seals and consistent shape.
- Keep a tidy station and work quickly for fewer reworks.
- Reserve a tiny dusting of starch at the seam for adhesion.
- Freeze wrapped pieces seam-side down until fully set.
| Focus | Action | Why it matters |
|---|---|---|
| Temperature | Chill tools and one-scoop workflow | Prevents melting and keeps shape |
| Stick control | Generous cornstarch on surfaces and gloves | Stops tearing and eases handling |
| Timing | Tailor microwave timing around 1200W | Achieves sticky, translucent dough without overcooking |
Flavor Ideas and Variations to Try
We pick flavors that let the chewy wrapper shine while delivering clear notes in each bite. Start with a base that works for most palates, then layer in bolder choices for contrast.
Classic vanilla, chocolate, and matcha
Vanilla is our go-to for a crowd-pleasing base that showcases the rice shell. We also use chocolate for richness and matcha for an earthy balance.
Mango, strawberry, and sorbet options
Fruit-forward picks like mango and strawberry cut through sweetness. Sorbets and dairy-free pints offer bright flavor and work if frozen solid before wrapping.
Ube and cocoa in dough or filling
Ube adds vivid color and mild nuttiness. We sometimes fold cocoa into the dough for a dramatic look and deep chocolate notes in the center.
- Pick high-quality pints that scoop cleanly from the freezer.
- Pre-scoop multiple flavors so guests can mix and match.
- Try seasonal sorbets for limited-run variety.
| Flavor | Profile | Pairing |
|---|---|---|
| Vanilla | Delicate, sweet | Matcha, mango |
| Chocolate | Rich, bold | Ube, cocoa dough |
| Mango (sorbet) | Bright, tangy | Vanilla, strawberry |
Storage, Serving, and Make-Ahead Tips
A simple storage routine preserves the chew of the dough and the firmness of the frozen center. We follow a clear plan that keeps flavor fresh and texture consistent when we serve guests.
Freeze and set
After assembly we freeze finished pieces at least 2–3 hours so the shell firms and the seam sets. Longer freezes are fine; for best texture plan on hours rather than minutes.
Softening before serving
Let items rest a few minutes at room temperature before plating. A short pause yields a pleasant chew and a creamy interior without a melted mess.
Airtight storage and labeling
Transfer set pieces into an airtight container. Keep each wrapped and place seam-side down in liners to avoid scuffs.
- Label containers with date and flavor so rotation is simple.
- Stage portions on parchment paper when serving to prevent condensation pooling.
- Store about one week for peak texture; up to two or three weeks possible if very well wrapped with minimal air exposure.
- Handle gently after softening; the exterior becomes delicate and will show fingerprints.
| Action | Timing | Why it matters |
|---|---|---|
| Initial freeze | 2–3 hours | Sets seam and preserves round shape of ice cream balls |
| Short thaw | Few minutes | Softens center for better chew and slicing |
| Long storage | 1–3 weeks | Airtight plastic wrap or container prevents dryer freezer air and flavor loss |
Ready to Roll: Let’s Make Mochi Ice Cream Today
Here’s a compact recap that helps us begin a batch and keep results steady.
Scoop and freeze firm ice cream centers, cook the sweet rice flour dough until nearly translucent, then dust, roll, and cut rounds. Work one frozen scoop at a time, wrap, seal, and refreeze for at least two hours.
Keep tools chilled, move briskly, and dust generously with starch to avoid stickiness. Use the microwave intervals we tested (1 min + 1 min + 30 sec) or steam and watch for that translucent doneness cue.
Assemble a variety pack—vanilla, chocolate, matcha, mango, or ube—so guests pick favorites. Let pieces soften briefly before serving to highlight the chewy shell and creamy center. We’ll repeat, refine thickness and cutter size, and soon this will be a go-to at home.