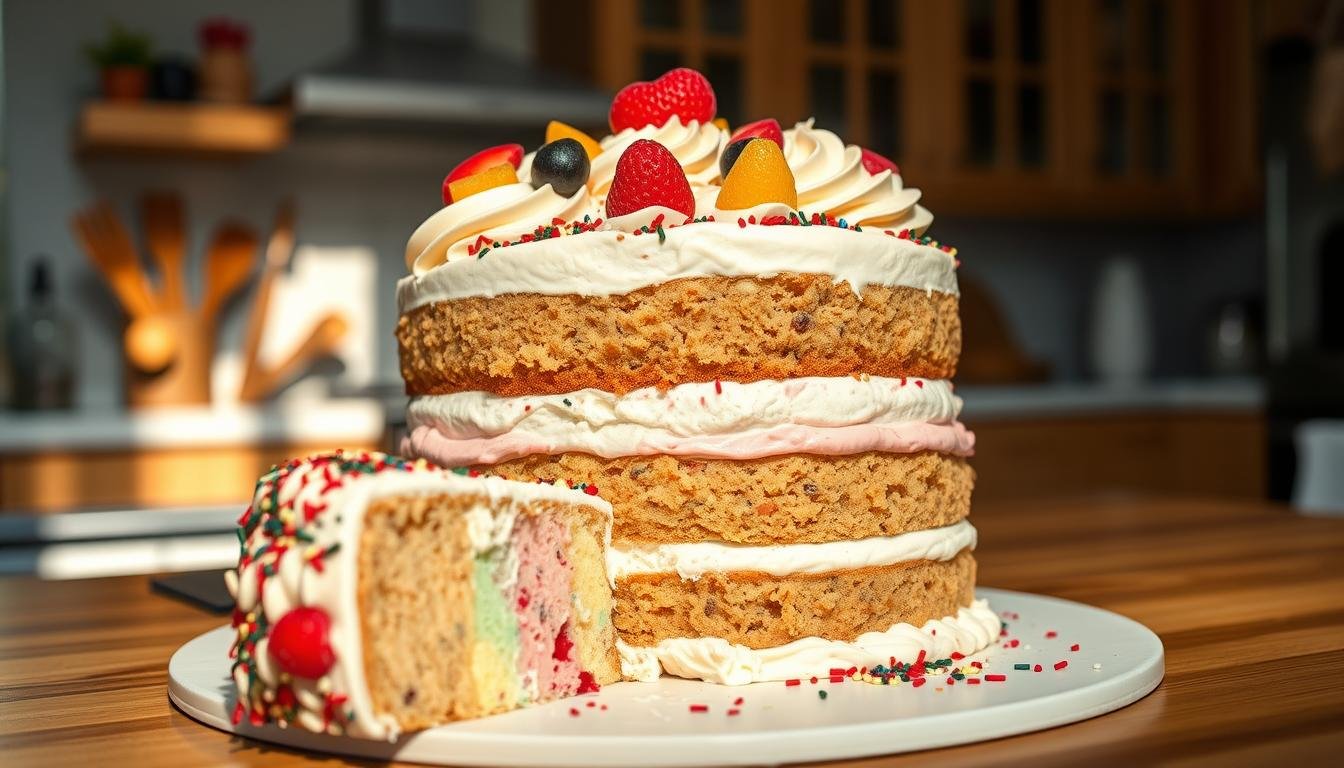
How to Make an Ice Cream Cake
We’ll build a no-bake layerable dessert that looks like it came from a bakery. Our plan pairs vanilla and chocolate ice cream with a baked Oreo crumble bound in butter, a ribbon of hot fudge or ganache, and a whipped cream frosting sweetened with powdered sugar.
We use a 9-inch springform pan lined with overlapping plastic wrap for easy unmolding. Soften tubs for 10–15 minutes and stir in a bowl for spreadable texture; do not microwave. Freeze each layer 1–2 hours, then wrap the assembled cake and freeze until firm.
For serving, let the cake rest 10 minutes at room temperature and run a hot knife between slices for clean cuts. Unfrosted cakes keep well in the freezer up to eight weeks; finished, tightly wrapped cakes stay best for 1–4 weeks.
What We’ll Make: A No-Bake, Party-Ready Ice Cream Cake
This recipe stacks two frozen flavors—vanilla and chocolate—with a fudgy stripe and a toasted Oreo crunch for party appeal. We keep the build no-bake and focused on clean strata so each slice looks sharp and tastes balanced.
We line an 8–9 inch springform pan with overlapping plastic wrap for easy lift-out. Each ice cream layer softens 10–15 minutes until spreadable, then we freeze between additions. The first set chills 30–60 minutes; after adding cooled ganache and crumbs we freeze 2 hours, then 4–6 hours or overnight before frosting.
Oreo crumbs get a quick bake at 350°F for 8–10 minutes with butter, then cool fully so the crunch stays crisp inside the cream cake. We finish with whipped cream, sprinkles, and a neat top that mimics a shop-style treat without a sponge layer that goes soggy.
- Springform pan lined with plastic wrap for clean unmolding.
- Hot fudge or cooled ganache makes the chocolate stripe sliceable from the freezer.
- Short softening minutes and staged freezing preserve distinct layers.
| Step | Action | Time/Temp |
|---|---|---|
| Crunch bake | Toast Oreo crumbs with butter | 350°F, 8–10 minutes |
| Layer setting | First freeze between layers | 30–60 minutes |
| Final freeze | After ganache and assembly | 4–6 hours or overnight |
Essential Tools and Setup for Success
Gathering the right gear up front speeds assembly and keeps each cake layer crisp.
We use an 8–9 inch springform cake pan lined with two overlapping sheets of plastic wrap so the whole dessert lifts out cleanly. Secure the overhang; we reuse that wrap to seal the pan during chill time.

An offset spatula smooths ice layers and whipped frosting. A stand mixer or a good hand mixer gives stable peaks quickly, and sturdy bowls plus spoons make softening tubs even and steady.
- Prep a baking sheet with parchment or a silicone mat for the Oreo-butter crumbs baked at 350°F for 8–10 minutes.
- Confirm freezer space ahead: our pan, a serving plate or cake circle, and a wrapped pan will move in and out during chill intervals.
- Keep a roll of wrap, hot water and towels nearby for quick sealing and clean slicing later.
| Tool | Purpose | Pro tip |
|---|---|---|
| 8–9″ springform pan | Hold layers; easy release | Line with two overlapping plastic sheets for lift-out and wrap |
| Offset spatula | Spread and level layers | Chill between passes for cleaner edges |
| Stand or hand mixer | Whip cream to stiff peaks | Keep bowl and beaters cold for best results |
| Baking sheet + parchment | Toast crumbs for crunch | Bake at 350°F for 8–10 minutes, cool completely |
Key Ingredients and Why They Matter
We choose ingredients that build contrast: mellow vanilla, deep chocolate, and a crunchy crumb for sharp slices.
Vanilla ice cream brings soft creaminess that lets other elements shine. Chocolate ice cream adds cocoa depth and visual contrast. We pick smooth tubs so each layer spreads and slices cleanly.
Hot fudge sauce or a cooled semi-sweet ganache gives a thick, gooey ribbon. A ganache made with semi-sweet chips, heavy cream, and a touch of corn syrup stays soft even when frozen.
- Oreo crumbs plus melted butter bake at 350°F for 8–10 minutes to lock in crunch; cool fully before adding.
- Whipped cream sweetened with powdered sugar freezes well and avoids cracking like buttercream.
- Sprinkles, maraschino cherries, or nuts add classic party appeal; swaps such as caramel, butterscotch, or peanut butter deliver different ribbons of flavor.
| Ingredient | Role | Tip |
|---|---|---|
| Vanilla ice cream | Base cream layer | Use smooth, spreadable tubs |
| Chocolate ice cream | Depth and contrast | Pick rich, even-texture varieties |
| Hot fudge / ganache | Gooey ribbon | Cool before layering so it slices |
| Oreo crunch | Texture contrast | Bake with butter; cool completely |
| Whipped cream frosting | Finish that freezes well | Sweeten with powdered sugar |
How to Make an Ice Cream Cake: Step-by-Step
Follow a clear step-by-step build so each frozen layer looks sharp and slices cleanly. We keep pacing, short softening windows, and staged freezes so the dessert stays stable.
Prep the pan
Line an 8–9 inch springform cake pan with two overlapping sheets of plastic wrap so the wrap overhangs for easy lift-out and top sealing.
Soften and spread the first layer
Let the first ice cream sit about 10–15 minutes until spreadable. Stir until smooth, then press evenly into the pan for a level base.
Bake the cookie crumble
Mix Oreo crumbs with melted butter and bake on parchment at 350°F for 8–10 minutes. Cool completely so the crunch stays intact inside the cream.
Add hot fudge and crunch
Spoon cooled ganache or warm hot fudge in a stripe, then sprinkle the cooled crumble and press gently. Freeze for 1–2 hours to set the layer boundaries.
Top, wrap, and freeze
Soften and spread the second ice cream layer, fold the overhang of plastic wrap over the surface to level, then freeze 4–6 hours or overnight.
Whip, frost, and decorate
Whip heavy cream with powdered sugar for about 4–5 minutes until stiff peaks form. Unmold, invert so chocolate sits on the bottom, frost quickly, pipe rosettes, add sprinkles and cherries, then return the cake to the freezer for at least 1–4 hours before serving.
- Keep track of minutes and hours at each step for steady progress.
- Work in a cool kitchen and use the freezer in stages for clean strata.
| Checkpoint | Action | Time |
|---|---|---|
| First softening | Soften and stir first ice cream | 10–15 minutes |
| Crunch bake | Bake Oreo-butter crumbs | 350°F, 8–10 minutes |
| Layer set | Freeze after ganache and crunch | 1–2 hours |
| Final set | Freeze assembled, wrapped cake | 4–6 hours or overnight |
Timing, Temperature, and Texture Control
Small windows of room-temperature softening and staged freezes keep each strata distinct. We use strict minutes and hours so the cream and ice elements stay smooth, not icy.
Soften tubs at room temperature for 10–15 minutes, then stir until uniform. Do not use the microwave; melted spots refreeze into icy streaks and ruin texture.
Softening windows
Expect 10–15 minutes of active softening for each ice cream addition. We spread immediately once the texture is pliable. Use the same window for vanilla and chocolate so layers match.
Freezer intervals
Set the first layer 30–60 minutes. After adding ganache and crunch, freeze about 2 hours. For final firmness, freeze at least 4–6 hours or overnight before frosting.
- Keep the pan chilled when idle so edges don’t warm.
- Make sure each layer feels firm to the touch before adding the next.
- Rest the assembled cake 10–15 minutes at room temperature before slicing for best mouthfeel.
| Step | Target | Why it matters |
|---|---|---|
| Softening | 10–15 minutes | Spreadable, even texture |
| First set | 30–60 minutes | Stability between layers |
| Final set | 4–6 hours or overnight | Sliceable, firm cake |
Pro Tips and Troubleshooting
A few careful moves in the kitchen prevent melting, sagging, and freezer mishaps. Prep a cool workspace and confirm freezer space before you start. We line the pan generously with plastic wrap so the whole dessert lifts out cleanly.

Let the Oreo crunch cool fully before assembly so it stays crisp and does not melt the ice cream. Choose whipped cream frosting; it freezes smoothly and avoids the cracking common with buttercream.
Eliminate freezer burn by wrapping the cake tightly with plastic wrap and sealing gaps. For long storage we double-wrap and, when possible, use an airtight container. Store in the coldest part of the cake freezer, away from the door.
For clean slices, rest the cake 10–15 minutes, run a sharp knife under hot water, dry it, slice, and wipe between cuts. Make sure each layer is fully set before adding the next.
- Keep tools chilled—cold spatulas and bowls help maintain firm edges.
- Avoid over-softening; if the layers get too soft, return the pan to the freezer.
- Keep decorations ready so we can frost and finish quickly, then return the cake to cold storage.
| Issue | Quick fix | Why it works |
|---|---|---|
| Melting layers | Work in a cool kitchen; chill tools | Keeps ice cream firm for neat spreading |
| Soggy crunch | Cool crumbs fully before adding | Prevents warm spots that melt cream |
| Freezer burn | Tight wrap with plastic; double-wrap | Blocks air and preserves texture |
| Messy slices | Knife hot water, dry and wipe between cuts | Warm blade slices like butter for clean pieces |
Flavor Variations and Layer Ideas We Love
We love swapping layers and add-ins that turn a simple frozen stack into a showstopper. Below are favorite builds that keep our structure but change the profile for different crowds.
Classic DQ-inspired
Vanilla and chocolate ice cream with a hot fudge ribbon and Oreo crunch delivers nostalgic appeal. It’s our baseline for crowd-pleasing slices.
Peanut butter swirl
Peanut butter–swirled ice cream over a fudge stripe, finished with chopped peanut butter cups, adds salty-sweet contrast.
Fruit-forward option
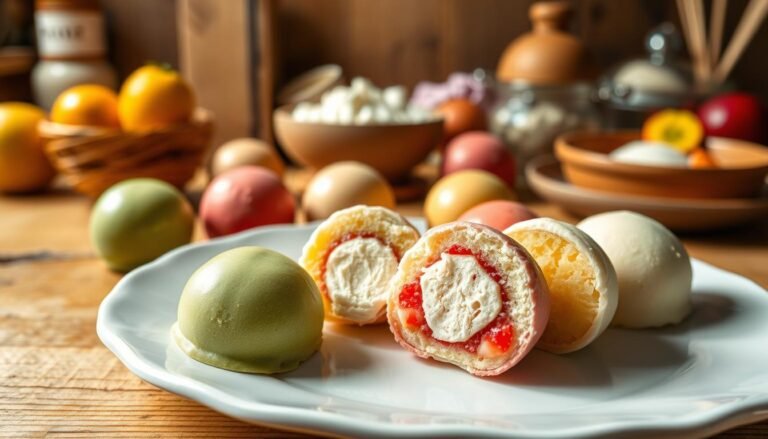
A vanilla base layered with strawberry ice cream and fresh fruit on top brightens the profile. Add fruit just before serving for best texture.
- Mint path: mint chocolate chip with a chocolate cake layer and mint cookies for cool refreshment.
- Hybrid: include a single chocolate cake layer if desired, accepting slight softening when frozen.
- Match cookie crunch to theme (Biscoff, graham, or Oreo) and keep it thoroughly cooled.
| Variation | Key elements | Why it works |
|---|---|---|
| Classic | Vanilla, chocolate, hot fudge, Oreo | Nostalgic, balanced |
| Peanut butter | Peanut swirl, hot fudge, chopped cups | Rich, salty-sweet |
| Fruit-forward | Vanilla, strawberry, fresh fruit | Bright, lighter finish |
Make-Ahead, Storage, and Freezer Strategy
We treat cold storage as part of the recipe, not just holding space, to protect texture and flavor. Plan storage steps so finishing day stays fast and the final slice looks and tastes great.

Assemble the layers without frosting, press the plastic overhang flat, then wrap the pan tightly. We double-wrap with plastic wrap and, when possible, place the pan inside a sealed container so air cannot reach the surface.
Assemble without frosting and freeze, then finish later
Build the core layers and freeze firm. This gives us a quick finish window on party day and keeps whipped cream bright.
How to wrap for up to eight weeks
- Double-wrap the solid pan, label with date and hours of storage.
- Store the baked Oreo crumble sealed in the fridge for up to five days or in the freezer up to eight weeks.
- Move a frozen cake to a cake circle or platter once solid, then re-wrap for stackable storage.
Store finished cakes and enjoy within the ideal window
Unfrosted assemblies keep best up to eight weeks in the cake freezer; finished, tightly wrapped cakes stay best 1–4 weeks. Some bakers report up to three months with meticulous double-wrap, but texture is optimum earlier.
| Item | Storage | Why |
|---|---|---|
| Unfrosted pan | Up to 8 weeks | Protects layers and fudge sauce |
| Finished cake | 1–4 weeks | Best cream and surface texture |
| Oreo crumble | Fridge 5 days / Freezer 8 weeks | Keeps crunch for assembly |
Before serving, thaw on the counter 10–15 minutes for cleaner slices. Refresh decorations day-of and keep the cake in the coldest area, away from the door swing.
Decorating, Slicing, and Serving Like a Pro
A sharp blade, chilled plates, and quick frosting moves give every slice bakery-level appeal. We focus on cold tools and fast work so the top stays neat and the layers hold their shape.
Prep and pipe
Chill a metal or glass bowl and beaters for 15 minutes. We whip heavy cream with powdered sugar on high for 4–5 minutes until peaks form and the whipped cream holds rosette detail.
Frost quickly, return the cake to the freezer, then pipe neat rosettes with a Wilton 1M, 2D, or Ateco 844 star tip for polished borders.
Slicing for clean servings
Rest the cake 10–15 minutes at room temperature before serving. Run a sharp knife under hot water, dry it, and slice; wipe the blade between cuts for crisp edges.
- Chill plates so slices don’t melt on contact.
- Keep decorations simple: sprinkles, cherries, or vanilla and chocolate shavings on top.
- Return leftovers to the freezer quickly and cover cut surfaces with plastic.
| Finish step | Tool | Timing |
|---|---|---|
| Whip frosting | Chilled bowl & beaters | 15 min chill, 4–5 min whip |
| Pipe rosettes | Star tip (Wilton/Ateco) | Pipe after quick freeze |
| Slice | Knife hot water, towel | Rest 10–15 min, wipe between cuts |
| Serve | Chilled plates | Stage garnishes ahead for smooth serving |
Your Turn to Build the Ultimate Ice Cream Cake
This is where planning meets flavor—our steps yield a neat, sliceable centerpiece. We assemble in a springform pan lined with plastic wrap, layering softened vanilla and chocolate ice cream with a baked, cooled Oreo-butter crunch and a stripe of hot fudge or ganache. Freeze between additions so each cake layer stays sharp.
We whip heavy cream with powdered sugar, frost, and pipe rosettes, then add sprinkles and cherries. Rest the cake 10–15 minutes before slicing with a hot knife for clean pieces. Wrap tightly, label, and store in the coldest area of the cake freezer.
Use this recipe as a base and refine flavor, thickness, and sugar levels until it becomes your favorite cream cake. Enjoy the results within the ideal window for best texture and taste.