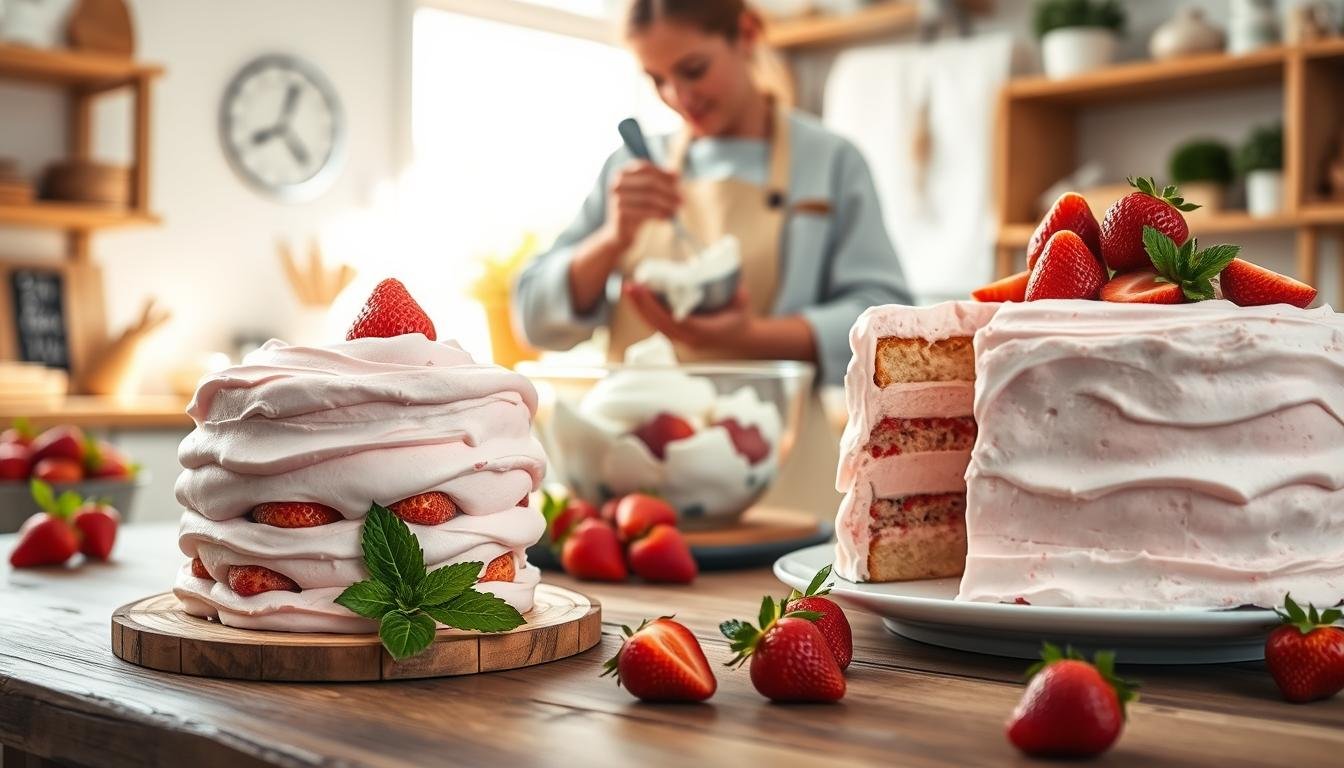
How To Make Strawberry Ice Cream Cake
We introduce a simple, shareable ice cream cake that channels the nostalgia of the strawberry shortcake bar. Our approach uses a baked Golden Oreo crust, layered vanilla and strawberry ice cream, and a crunchy cookie-and-berry topping.
We walk through clear steps: press the crust in a 9×9 pan with a parchment overhang, spread softened frozen layers, add whipped topping, then finish with crushed cookies and freeze-dried fruit for crunch ice cream texture.
This recipe fits a busy summer schedule. There’s no special gear — just a standard pan and a reliable freezer. We’ll share timing tips so the layers set firm and slice cleanly after a short rest.
Expect a lightly pressed crust, spreadable but not runny filling, and a topping that offers both fine crumbs and chunky bits. This dessert is an easy win for gatherings and a fun way for us to recreate a favorite treat at home.
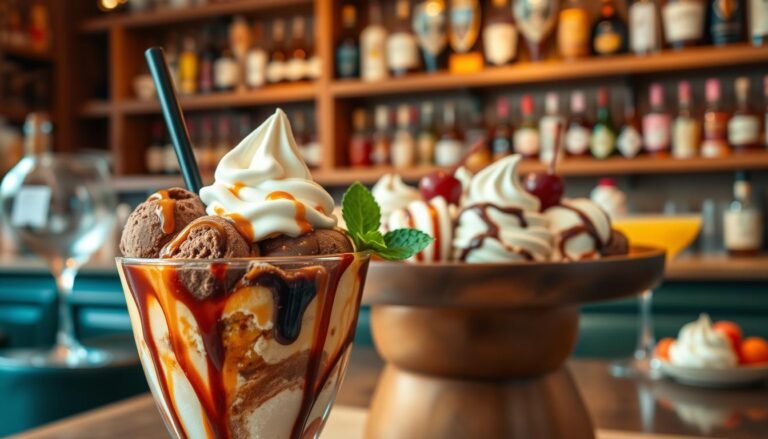
Why This Strawberry Ice Cream Cake Belongs In Your Summer Dessert Lineup
We bring a chilled, shareable treat that turns the classic strawberry-and-vanilla bar into a sliceable summer centerpiece.
Strawberries, cream, and crunch: the flavor trifecta
The appeal is simple: bright strawberry notes meet rich vanilla cream and a buttery cookie crunch. Each bite balances fruit, sweetness, and texture.
That crunch mimics cake crumbs while adding buttery depth. It keeps slices from feeling flat and gives the dessert a satisfying contrast.
Ice cream truck nostalgia, shareable format
We reconnect that roadside novelty with the convenience of a pan. The format serves more people, slices cleanly, and looks layered for serving.
- Familiar flavors that click instantly for guests.
- Easy assembly with a standard pan and common ingredients.
- Make-ahead friendly: assemble, freeze, and bring out chilled.
This ice cream cake is ideal for summer gatherings, birthdays, and casual barbecues. We’ll show how to lock in structure and crunch so every slice tastes like a perfected crunch ice cream bar.
How To Make Strawberry Ice Cream Cake: What We’ll Cover
Our game plan covers tools, timing, and tricks for tidy layers and lasting crunch.
We list what we’ll do: choose a 9×9 pan, line it with parchment for easy lift-out, bake a cookie crumb base, and press lightly so slices cut cleanly.
Next comes softening vanilla and strawberry ice cream just long enough—about 5 minutes—so it spreads without melting. Freeze between layers for firm edges.
- Tools and setup: pan, parchment overhang, food processor for crumbs.
- Crust: fine crumbs + melted butter; press, don’t pack, then bake and cool.
- Layering: spread softened vanilla, freeze, add strawberry layer, then chill in freezer until set.
We compare whipped topping and fresh whipped cream in the table below so you can pick the finish that fits your schedule.
| Option | Speed | Flavor/Texture |
|---|---|---|
| Whipped topping | Fast | Stable, sweet |
| Fresh whipped cream | Slower | Light, fresher |
| Tips | Use colder brand-stable tubs | Avoid melted edges by quick freezes |
We finish with brief variations and storage notes so your cream cake stays bright in the freezer and slices neatly after a short rest at room temperature.
Ingredients You’ll Need For Authentic Strawberry Crunch Flavor
We list the key ingredients that give this chilled dessert its crisp contrast and clean fruit notes. Gather simple pantry items and two quality tubs for best results.

Cookie base and crunchy topping
- Golden Oreo cookies — finely crushed for the base; keep the cream filling for binding.
- Melted butter (about 1/3 cup) binds crumbs without making a rock-hard crust.
- Coarsely crushed Oreos + crushed freeze-dried strawberries for the topping — mix big and small pieces for texture.
Ice cream layers
- High-quality vanilla ice cream (vanilla bean flecks add depth).
- Strawberry ice cream made with real fruit; consider a sprinkle of freeze-dried powder to boost berry notes.
Toppings and finishes
- Thawed whipped topping for speed, or freshly whipped cream stabilized with powdered sugar for richness.
- Fresh strawberries for garnish so each slice reads bright at a glance.
| Ingredient | Role | Freezer behavior |
|---|---|---|
| Golden Oreo cookies | Sweet structure for base | Stays firm, crushable |
| Vanilla & strawberry ice cream | Layered flavor and body | Remains scoopable when briefly rested |
| Freeze-dried strawberries | Crunch and concentrated fruit | Stays crisp on top |
Tools And Prep: Pan, Parchment Paper, Plastic Wrap, And A Food Processor
A little prep goes a long way when you want neat layers and a clean release from the pan.
Why the parchment overhang matters
Line a 9×9-inch pan with parchment and leave a 1-inch overhang on two sides. That overhang gives us a reliable handle to lift the frozen dessert without cracks.
Choosing the right pan or ring
For square builds use a sturdy 9×9 pan. For round desserts an adjustable cake ring or a tall cake pan works well. Line round molds with parchment or waxed paper so the layers release cleanly.
- Use a food processor for even, fine crumbs; it saves time and yields consistent texture.
- No processor? Put cookies in a zip-top bag and crush with a rolling pin.
- Preheat oven to 350°F for baking the crust, and clear space in the freezer before assembly.
- Cover layers with plastic wrap between freezes to block odors and prevent frost.
| Tool | Role | Tip |
|---|---|---|
| Food processor | Crush cookies | Pulse short bursts |
| Parchment paper | Line pan & lift | Use 1-inch overhang |
| Freezer | Firm layers | Keep cold, stable temp |
Step-By-Step: Build The Cookie Crust And Bake Until Firm
Our first step is a light, even cookie press that creates a uniform bottom for the dessert. We keep the method simple so the base sets without becoming rock-hard.
Crush and combine
Finely crush 24 Golden Oreo cookies in a food processor or a sealed bag. Mix crumbs with about 1/3 cup melted butter until the mixture looks like wet sand.
Press, don’t pack
Line a 9×9-inch pan with parchment paper and smooth corners. Press the crumbs lightly and evenly across the bottom with a flat-bottomed cup. Avoid packing tightly; a gentle tamp evens thickness without compressing the crumbs.
Bake, cool, and chill
Bake at 350°F for 15 to 20 minutes until the crust firms and shows light color. Cool the pan on a rack to room temperature before adding any ice cream layer. If needed, save a little crumb mix for patching thin spots, then briefly chill the cooled crust in the freezer for faster firming.
- Pulverize cookies to fine crumbs.
- Combine crumbs with melted butter; press lightly in parchment-lined pan.
- Bake 15–20 minutes at 350°F; cool on a rack, then chill briefly before layering.
| Step | Goal | Timing/Tip |
|---|---|---|
| Crush cookies | Fine, even crumbs | Use food processor or bag; reserve 2 tbsp for topping |
| Press crust | Uniform bottom, not packed | Gentle tamp with cup; smooth corners with spatula |
| Bake & cool | Firm base for layering | 350°F for 15–20 minutes; cool on rack then chill briefly |
Create Distinct Ice Cream Layers For Clean, Beautiful Slices
Clear timing and gentle handling help us build vivid, even bands that hold shape when sliced. Begin by softening tubs just long enough so the vanilla ice cream spreads without melting; short minutes at room temperature usually work.

Softening and spreading
Spread softened vanilla over the cooled crust, filling corners and smoothing with an offset spatula. Cover the surface with a sheet of plastic wrap and press lightly to level the bottom layer.
Layer order and freezing
Place vanilla on the bottom for structure and contrast, then chill in the freezer. While that firms, set the strawberry ice cream out to soften. Add the top layer, cover, and freeze again.
- Softening time: brief minutes until spreadable, not runny.
- Freeze at least 2 hours between layers for clean separation.
- Chill tools and work by the freezer door to limit heat transfer.
- Add a thin sprinkle of crunch between layers and press gently if desired.
- Use a cardboard cake circle under plastic for even pressure when leveling.
| Task | Goal | Timing |
|---|---|---|
| Softening | Spreadable tubs | Few minutes |
| Freeze | Firm layers | At least 2 hours |
| Level | Even top | Plastic wrap + circle |
Finish With Whipped Topping And The Signature Strawberry Crunch
We seal the layers with a light whipped top and a crunchy berry-cookie mix that stays crisp in the freezer. Right after spreading the strawberry layer, smooth an even coat of whipped topping over the surface.
Whipped topping vs. freshly whipped cream
- Whipped topping: fast, stable, and holds shape during hours of freeze time.
- Freshly whipped cream: richer dairy flavor. Whip heavy cream with powdered sugar and vanilla to stiff peaks, then frost quickly.
- Choose based on time, flavor, and how long the dessert will sit before serving.
Mix remaining golden oreo cookies with coarsely crushed freeze-dried strawberries for texture. Aim for a balance of powdery bits and larger pieces so the mixture adheres to the top.
Optional: split crumbs, stir in dry strawberry gelatin for half, bake 5–8 minutes at 350°F for extra color and crunch. Press the crunch gently onto the tacky top, then return the pan to the freezer for several hours so the top sets cleanly.
| Step | Result | Tip |
|---|---|---|
| Spread top | Insulates layers | Work quickly; smooth with offset spatula |
| Sprinkle crunch | Stable texture | Apply while surface is tacky |
| Final freeze | Clean slices | Cover pan to block freezer odors |
Pro Tips: Timing, Freezer Strategy, And Avoiding Melted Messes
A clear rhythm of short softening and long freezes keeps our dessert structured and sliceable.
Softening in minutes is for spreading; freezing in hours is for stability. Freeze each layer until firm and chill the finished pan for eight hours or overnight. Let the dessert rest 5 to 10 minutes at room time before slicing so the center gives slightly without collapsing.
Brands and handling
Some tubs soften faster than others. Tillamook Oregon Strawberry, for example, can lose structure quickly. If a tub softens too fast, shorten work intervals and return the pan to the freezer longer before decorating.
- Stage the freezer: clear flat space and use chilled sheet pans as carriers.
- Chill knives, spatulas, and bowls to reduce heat transfer and keep neat edges.
- Cover the pan tightly during long freezes to prevent ice crystals and off-odors.
- Add fresh strawberries just before serving; refreezing fresh fruit makes it icy.
- Press the center lightly to confirm the interior is firm before unmolding.
- Build the dessert a day ahead so you have the hours needed for a fully set interior.
| Step | Goal | Timing |
|---|---|---|
| Softening tubs | Spreadable without melting | Few minutes |
| Freeze layers | Firm separation | At least 2 hours each |
| Final chill | Fully set interior | 8+ hours or overnight |
Smart Variations: Cake Layer, Different Cookies, Vegan And Gluten-Free Options
We offer simple swaps that let you trade the crumb base for a tender baked layer or adapt the recipe for plant-based and gluten-free diets.
Swap the vanilla ice cream bottom for a single baked vanilla or strawberry cake layer. Bake in a 9-inch square pan, cool completely, then add the frozen layers. Cooling fully prevents melting and keeps clean lines when we finish.
For different crumbs, try graham crackers, shortbread, or vanilla wafers. Each brings a unique buttery or honeyed note that complements the top layers and adds contrast in texture.
- Vegan path: use plant-based ice cream, dairy-free whipped topping, and vegan butter; Golden Oreos are usually vegan and work well.
- Gluten-free path: use certified gluten-free sandwich cookies and mix in dry strawberry Jell-O; bake crumbs 5–8 minutes at 350°F for a crunchy finish.
- Tip: a thin crunch layer between layers gives texture even with a cake bottom. Test small batches of crumbs so the base stays fine and the top stays chunkier.
- Match flavors: shortbread pairs nicely with strawberry-forward layers; choose a pan or ring that fits the chosen bottom so edges stay neat.

| Variation | Base | Best use |
|---|---|---|
| Cake layer | Baked vanilla or strawberry cake, cooled | For softer bottom and classic sliceable presentation |
| Cookie swaps | Graham, shortbread, vanilla wafers | Adjusts crumbs and buttery flavor for balance |
| Vegan | Plant-based ice cream, dairy-free topping, vegan butter | Maintains structure and similar mouthfeel |
| Gluten-free | Gluten-free cookies + strawberry Jell-O crumbs (baked) | Crisp, colored crunch that holds in the freezer |
Serving, Slicing, And Presentation: Show Off Those Layers
A few quick tricks at serving time keep edges sharp and the crunch alive for every piece.
Lift the pan by the parchment overhang so the dessert stays level. If it clings, run a hot, damp towel briefly around the outside of the pan to loosen the bottom and sides.
Use the parchment overhang or a warmed towel around the pan
We lift using the overhang and transfer the whole block onto a cake pan or board for cutting. This keeps the bottom flat and prevents slumping while we slice.
Hot knife method for clean squares every time
Heat a sharp chef’s knife under very hot water, dry it, then slice straight down for neat squares. Wipe and reheat the blade between cuts so the top and layers stay tidy.
- Trim a thin edge first to reveal a clean side, then portion into even pieces.
- Let the dessert stand about 10 minutes so the vanilla ice cream and strawberry ice cream soften slightly for cleaner cuts.
- Plate each piece with a sprinkle of loose crunch and a few fresh strawberries for color and contrast.
- Serve quickly and return the remainder to the freezer to keep ice crystals at bay.
| Action | Why it helps | Timing |
|---|---|---|
| Lift with parchment | Prevents cracking and keeps base level | Immediate before slicing |
| Warm towel on pan | Loosens edges without melting the top | 10–20 seconds |
| Hot, wiped knife | Creates smooth faces and preserves layers | Reheat between each cut |
Make-Ahead, Storage, And How Long It Keeps In The Freezer
We assemble the dessert one to two days before serving so layers have ample hours to set. Cover the pan tightly with plastic wrap and a sheet of parchment or paper to block freezer odors and frost.
Short rest before slicing
Before cutting, let the frozen block sit 5 minutes at room temperature. A brief minutes-long rest makes slicing cleaner and prevents cracking when we use a warmed knife.
Whole cake vs. pre-sliced storage
- Keep the whole cake covered on a flat board or cake pan for safe moving.
- Or pre-slice and pack pieces into freezer-safe airtight containers for grab-and-serve convenience.
- Add fresh strawberries just before serving to avoid icy fruit on top.
| Storage Method | Duration | Tip |
|---|---|---|
| Whole pan, wrapped | Best 2 weeks; airtight up to 2 months | Label with date and flavor notes |
| Pre-sliced pieces | Best 2 weeks; airtight up to 2 months | Stack with parchment between pieces |
| Fresh fruit | Serve fresh, do not refreeze | Add at plating to avoid iciness |
Bring It All Together: Our Best Recipe Blueprint For Strawberry Ice Cream Cake Success
We follow a tight sequence: line a 9×9 pan with a 1-inch parchment overhang, bake a Golden Oreo crust with melted butter at 350°F for 15–20 minutes, then cool fully.
Spread softened vanilla ice cream over the bottom, freeze until firm, add softened strawberry ice cream, and cover with thawed whipped topping or fresh whipped cream. Mix crushed cookies with freeze-dried strawberries and press the mixture onto the top.
Freeze at least eight hours or overnight. Let the block rest 5–10 minutes, lift using the parchment, and slice with a hot knife. Store leftovers in airtight containers. Follow these minutes-and-hours cues and the recipe will yield neat layers, a crisp bottom, and a reliably nostalgic crunch ice cream experience.